1. Introduction
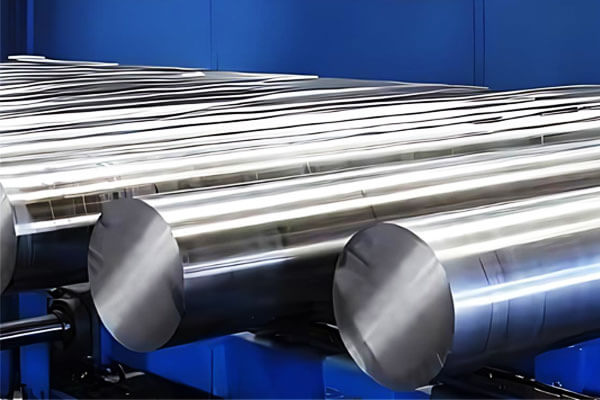
D2 tool steel has long been recognized for its exceptional wear resistance and dimensional stability, making it a staple in cold-working applications.
Originating from the early 20th century’s advancements in alloying technology, D2 is a high-carbon, high-chromium steel that sets the benchmark for tools operating under severe wear conditions.
This article delves into the properties, processing, and applications of D2 tool steel, answering key questions about its suitability for various industries.
By exploring its chemical composition, physical and mechanical attributes, heat treatment protocols, and machining challenges,
We aim to provide a comprehensive understanding of why D2 remains a preferred choice for demanding tooling requirements.
2. Chemical Composition
D2 tool steel owes its exceptional wear resistance and dimensional stability to a carefully engineered alloy chemistry.

By combining high carbon content with strategic additions of chromium, molybdenum, and vanadium, metallurgists create a matrix rich in hard carbides that resist abrasion and retain cutting edges under heavy load.
Key Alloying Elements and Their Roles
| Element | Typical Content (%) | Metallurgical Role |
|---|---|---|
| Carbon (C) | 1.40 – 1.60 | Forms cementite and complex chromium carbides; directly correlates with hardness and wear resistance |
| Chromium (Cr) | 11.00 – 13.00 | Promotes formation of hard M₇C₃ and M₂₃C₆ carbides; adds corrosion resistance; boosts hardenability |
| Molybdenum (Mo) | 0.70 – 1.40 | Refines prior carbides; enhances toughness and red-hardness; retards grain growth during austenitizing |
| Vanadium (V) | 0.30 – 1.10 | Creates extremely hard MC-type carbides that improve edge retention and resist micro-cracking |
| Manganese (Mn) | ≤ 1.00 | Acts as a deoxidizer; assists in hardenability but can reduce toughness if over-added |
| Silicon (Si) | ≤ 1.00 | Deoxidizer; contributes modestly to strength and contributes to carbide morphology |
Characteristic Carbide Phases
D2’s wear resistance stems from a dual-carbide system:
Chromium-Rich Carbides (M₇C₃, M₂₃C₆)
- These chromium carbides appear as blocky or angular precipitates within the tempered martensite matrix.
- They account for roughly 30–40% of the microstructure by volume, providing bulk resistance to abrasive wear.
Vanadium-Rich MC Carbides
- Nanoscale MC particles (rich in vanadium and carbon) distribute uniformly throughout the steel.
- Even a 5–10% volume fraction of MC carbides dramatically boosts edge retention by impeding crack initiation.
3. Equivalent Brands and Standards
D2 tool steel aligns with several international specifications. Below are the primary equivalents up to the ASTM designation:
| Standard/Brand | Designation | Equivalent | Region |
|---|---|---|---|
| AISI/SAE | D2 (UNS T30402) | — | USA |
| DIN | 1.2379 | D-2 | Germany/Europe |
| JIS | SKD11 | D-2 | Japan/Asia |
| BS | BS 1407M40 | D-2 | UK |
| AFNOR | X210Cr12 | D-2 | France |
| ASTM | A681 | D-2 | International |
4. Mechanical Properties
D2 tool steel balances extreme hardness with sufficient toughness, enabling it to withstand high wear while resisting brittle failure.

The table below summarizes its key mechanical metrics in the quenched-and-tempered condition (typically 60 HRC), followed by a brief discussion of their implications.
| Property | Typical Value | Units | Notes |
|---|---|---|---|
| Tensile Strength (σₜ) | 2 000 – 2 200 | MPa | High ultimate strength supports heavy loads in cold-working operations. |
| Yield Strength (σᵧ 0.2%) | 1 850 – 2 000 | MPa | Minimal plastic deformation under high compressive forces preserves dimensional accuracy. |
| Rockwell C Hardness | 58 – 62 | HRC | Exceptional surface hardness ensures superior abrasion resistance. |
| Brinell Hardness (HBW) | 700 – 750 | HBW | Corresponds with HRC for cross-referencing in international standards. |
| Charpy V-Notch Impact | 10 – 15 | Joules | Adequate energy absorption prevents catastrophic cracking in shearing and trimming applications. |
| Elongation at Break | 2 – 3 | % | Limited ductility; design must account for low deformation capacity in hardened sections. |
| Modulus of Toughness | 20 – 25 | MJ/m³ | Area under stress-strain curve quantifies overall energy absorption before fracture. |
5. Physical Properties
Beyond its mechanical performance, D2 tool steel exhibits a set of physical characteristics that influence heat flow, dimensional stability, and electromagnetic behavior in service.
Below is a summary of its key physical properties in the hardened (60 HRC) condition:
| Property | Typical Value | Units | Notes & Implications |
|---|---|---|---|
| Density | 7.75 g/cm³ | Heavier than water, affecting die mass and handling. | |
| Young’s Modulus (Elastic Modulus) | 205 GPa | High stiffness ensures minimal elastic deflection under load. | |
| Poisson’s Ratio | 0.28 | Indicates moderate lateral contraction when stretched. | |
| Thermal Conductivity | 20 W/m·K | Relatively low thermal conductivity aids in heat retention in tooling faces. | |
| Specific Heat Capacity | 460 J/kg·K | Energy required to raise temperature, relevant for tempering and quench design. | |
| Coefficient of Thermal Expansion | 11.5 µm/m·K | Thermal expansion effects are moderate, facilitating tight die clearances over temperature cycles. | |
| Electrical Resistivity | 0.70 µΩ·m | Higher resistivity than low-alloy steels, impacting EDM parameters and electrical heating behavior. | |
| Magnetic Permeability (Relative μᵣ) | 1.002 | Nearly identical to free space; confirms D-2’s non-magnetic (diamagnetic) character in most applications. | |
| Rockwell C Hardness (Typical, quenched/tempered) | 60 HRC | Although a mechanical property, hardness influences surface contact, friction, and heat generation in use. |
6. Heat Treatment & Processing
Optimizing D2 tool steel’s performance hinges on precise heat treatment and careful processing.
By controlling annealing, austenitizing, quenching, tempering, and optional cryogenic steps,
manufacturers tailor the steel’s hardness, toughness, and dimensional stability to demanding cold-working tasks.

Annealing and Stress Relief
Purpose: Soften D2 for machining, relieve residual stresses, and spheroidize carbides.
- Procedure: Heat slowly to 800–820 °C, hold for 2–4 hours, then cool in the furnace at 20 °C/hour to 650 °C, followed by air cooling.
- Result: Achieves ~240 HBW, with uniformly spheroidized carbides that minimize tool wear on cutting edges and prevent chipping.
Before any hardening cycle, use a pre-stress relief at 650 °C for 1 hour to remove machining-induced stresses.
Hardening (Austenitizing and Quenching)
Objective: Transform to martensite and dissolve sufficient carbides for maximum wear resistance.
Austenitizing:
- Temperature: 1 020–1 040 °C
- Soak Time: 15–30 minutes (depending on section thickness)
- Atmosphere: Controlled-atmosphere furnace or salt bath to prevent decarburization and oxidation.
Quenching:
- Media: Warm oil (50–70 °C) or air for minimal distortion; salt bath quench (400–500 °C) for faster cooling and reduced stress.
- Distortion Control: Use fixtures or interrupted quench techniques, especially for complex geometries.
Outcome: Yields ~62 HRC maximum and a martensitic matrix with fine, dispersed carbides.
Tempering Cycles
Goal: Balance hardness and toughness, reduce brittleness, and relieve quench stresses.
- Low-Temperature Tempering (150–200 °C):
-
- Result: Hardness remains 60–62 HRC, with modest toughness. Ideal for applications demanding extreme wear resistance and edge retention.
- Medium-Temperature Tempering (500–550 °C):
-
- Result: Hardness drops to 55–58 HRC while toughness increases by 20–30%. Best for tools exposed to impact or moderate shocks.
- Procedure: Perform two consecutive tempering cycles, holding 2 hours each, followed by air cooling.
Cryogenic Treatment
Purpose: Convert retained austenite to martensite and refine carbide distribution.
- Process: After quenching, cool to –80 °C (dry ice/ethanol) for 2 hours, then return to room temperature.
- Benefit: Increases hardness by 2–3 HRC and marginally improves wear resistance without notable loss in toughness.
Final Stress Relief and Straightening
Following tempering (and cryogenic treatment, if used), conduct a final stress relief at 150–200 °C for 1 hour. This step stabilizes dimensions and minimizes the risk of warping during service.
7. Machinability & Fabrication
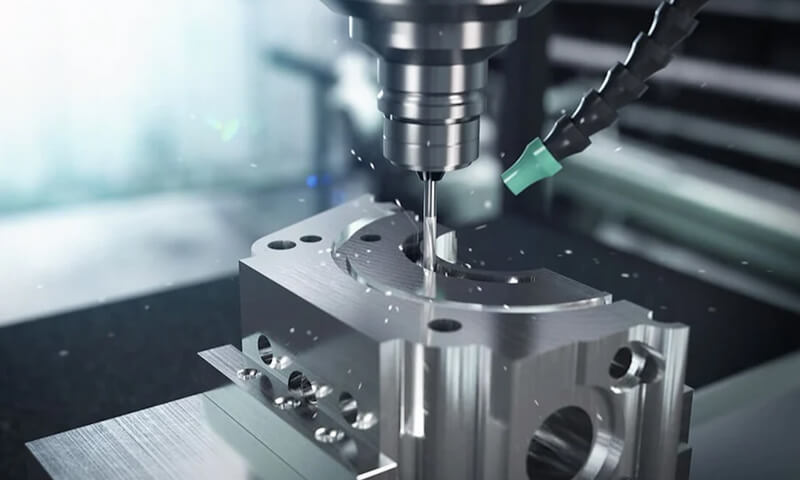
D2 tool steel’s high carbide content and pre-hardened microstructure pose unique challenges during machining and fabrication.
By selecting appropriate tooling, optimizing cutting parameters, and following specialized welding and finishing practices,
manufacturers can produce accurate, high-quality parts while preserving D2’s wear-resistant properties.

Machining Hardened D2
Although annealed D2 (∼240 HBW) machines readily, many applications start with pre-hardened stock (50 ± 2 HRC). In this condition:
- Tooling:
-
- Carbide inserts with TiC or TiCN coatings resist abrasion from hard chromium and vanadium carbides.
- Polycrystalline cubic boron nitride (PCBN) excels for high-volume roughing of hardened surfaces.
- Cutting Parameters:
-
- Speed: 60–90 m/min for carbide; 100–150 m/min for PCBN.
- Feed: 0.05–0.15 mm/rev to balance tool life and surface finish.
- Depth of cut: 0.5–2 mm; shallow passes reduce cutting forces and heat generation.
- Coolant: Flood coolant or through-tool delivery minimizes built-up edge and keeps cutting zones below 200 °C, preventing carbide pull-out.
Transitionally, adopting these recommendations enhances surface integrity and dimensional accuracy, critical for tight-tolerance tooling.
Welding and Repair
Welding D2 demands careful control to avoid cracking and preserve the martensitic matrix:
- Pre-heat: Bring parts to 200–300 °C to reduce thermal gradients.
- Interpass Temperature: Maintain 200–250 °C between passes to alleviate residual stresses.
- Filler Metals: Use low-alloy, high-hardness rod (e.g., AWS A5.28 ER410NiMo) compatible with D2’s chemistry.
- Post-Weld Heat Treatment: Stress-relieve at 500 °C for 2 hours, then temper according to Section 5 to restore toughness and hardness.
These steps minimize hydrogen-induced cracking and ensure weld zones match base-metal performance.
Grinding and Electrical Discharge Machining (EDM)
For intricate geometries and fine finishes, non-conventional methods excel:
- Grinding:
-
- Wheel Selection: Use aluminum-oxide or cubic boron nitride wheels (46A60H–54A80H) with soft bonds to prevent glazing.
- Parameters: Light infeed (0.01–0.05 mm) and high wheel speed (30 m/s) yield Ra ≤ 0.4 µm.
- EDM:
-
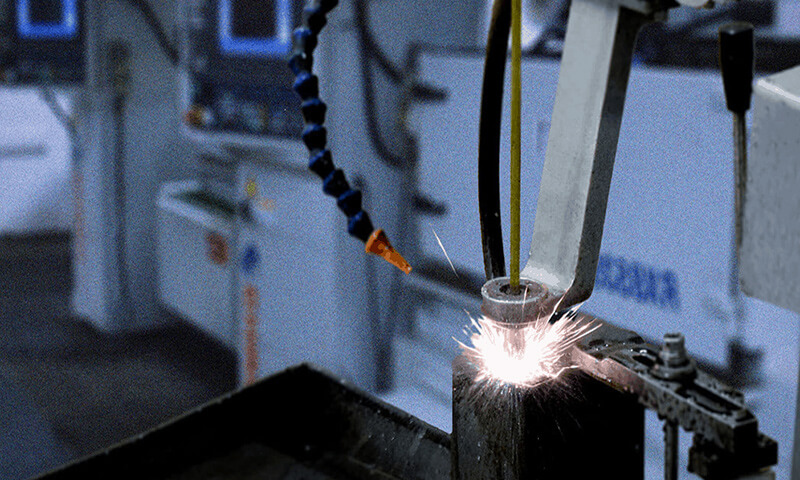
- Die Sinking or Wire EDM creates complex cavities without inducing mechanical stresses.
- Dielectric Fluid: Hydrocarbon oil with controlled flushing prevents re-deposition of carbides.
- Machining Rates: Typically 0.1–0.5 mm³/min, depending on electrode geometry and power settings.
Incorporating EDM and precision grinding allows D2 components to achieve near-net shapes and mirror finishes while maintaining the full hardness of the tool steel.
Surface Finishing and Coating
To further extend tool life, consider these finishing options:
- Polishing: Final polish to Ra ≤ 0.2 µm reduces friction and debris adhesion.
- PVD Coatings: Titanium nitride (TiN) or aluminum titanium nitride (AlTiN) layers add a hard, low-friction surface, increasing wear life by up to 50%.
- Nitriding: Low-temperature gas nitriding (500 °C) diffuses nitrogen to form a hardened case, enhancing surface hardness to HRC 70+ without distorting core dimensions.
8. Key Applications of D2 Cold Working Tool Steel
D2’s balance of wear resistance and toughness suits:
- Cold-work dies: Blanking, forming, and trimming operations exceeding 1 million cycles.
- Cutting blades: High-speed shear knives maintaining sharp edges under abrasive slurries.
- Punch and die sets: Reliable performance in stamped components for automotive and appliance industries.
- Wear parts: Rollers, ejector pins, and bushings in high-abrasion environments.
- Additive-assisted tooling inserts: Hybrid mold inserts combining D2 with conformal cooling channels.
9. Performance Comparison: D2 vs. Other Tool Steels
D2 cold working tool steel is widely recognized for its exceptional wear resistance and moderate toughness.
However, in selecting tool steel for manufacturing applications, it’s critical to compare D2 with other popular tool steels to assess trade-offs in performance, durability, and cost.
This section provides a detailed comparison of D2 with A-2, M-2, and S-7, supported by data and real-world case insights.
Tool Steel Comparison Table
| Property / Steel Type | D-2 | A-2 | M-2 | S-7 |
|---|---|---|---|---|
| Primary Strength | Wear resistance | Toughness & dimensional stability | Red hardness & cutting performance | Impact resistance |
| Hardness (HRC) | 55–62 | 57–62 | 62–66 | 54–58 |
| Wear Resistance | ★★★★☆ | ★★★☆☆ | ★★★★★ | ★★☆☆☆ |
| Toughness | ★★☆☆☆ | ★★★★☆ | ★★☆☆☆ | ★★★★★ |
| Machinability | ★★☆☆☆ | ★★★★☆ | ★☆☆☆☆ | ★★★☆☆ |
| Red Hardness | ★★☆☆☆ | ★★☆☆☆ | ★★★★★ | ★★☆☆☆ |
| Heat Treatment Stability | ★★★☆☆ | ★★★★☆ | ★★☆☆☆ | ★★★☆☆ |
| Best Applications | Blanking, trimming, punches | Forming dies, tooling blocks | High-speed cutters, drills | Chisels, injection dies, hammers |
| Cost Level | Medium | Medium | High | Medium |
10. Conclusion
D2 cold working tool steel stands out for its unparalleled combination of wear resistance, dimensional stability, and thermal stability.
Its versatility across a wide array of applications—from traditional cold work dies to emerging additive manufacturing techniques—makes it an indispensable material in modern manufacturing.
Understanding the nuances of D2’s chemical composition, mechanical properties, and processing techniques empowers
engineers and designers to leverage its full potential, ensuring optimal performance and efficiency in their projects.


